
Step by step guide
Introduction
I took this photo on a long afternoon walk in Watermillock in the Lake District a few weeks ago. It started off as a sunny afternoon, but by the time I came across this tree, it had clouded over and become quite dull. However it struck me that the colours were so warm and bright that, even on a dull afternoon, it seemed to almost possess its own light.
Now as I am sat in my studio looking at the photo I thought I might try and capture this glow in a little watercolour.

Step 1
I started by doing a loose drawing of the outline shape of the tree, before wetting the paper all over with a 1" flat brush. I then immediately went on to brush in some masking fluid into the wet background, roughly following the shapes of the foliage. Hopefully this would keep white paper in the areas I later wanted to paint in the bright autumn colours, but with a soft, feathered edge more appropriate for describing tree foliage, rather than the hard edge you would normally get where masking fluid has been applied.
This method of using masking fluid on a wet background can be very effective, and I have used it many times in the tutorials on my website watercolourlandscapes.co.uk. There is also a short tutorial piece on the website that demonstrates this method in detail.

Step 2
Once the masking fluid had dried, I put in a wet-into-wet background to represent the sky and background fir trees. I used French Ultramarine for the sky and a mixture French ultramarine, viridian and burnt sienna to make a dark blue/green for the fir trees.
I deliberately made this background green more blue than I normally would because blue is the opposite of orange, and would hopefully increase the contrast with the autumn foliage, giving the whole thing a lift.

Step 3
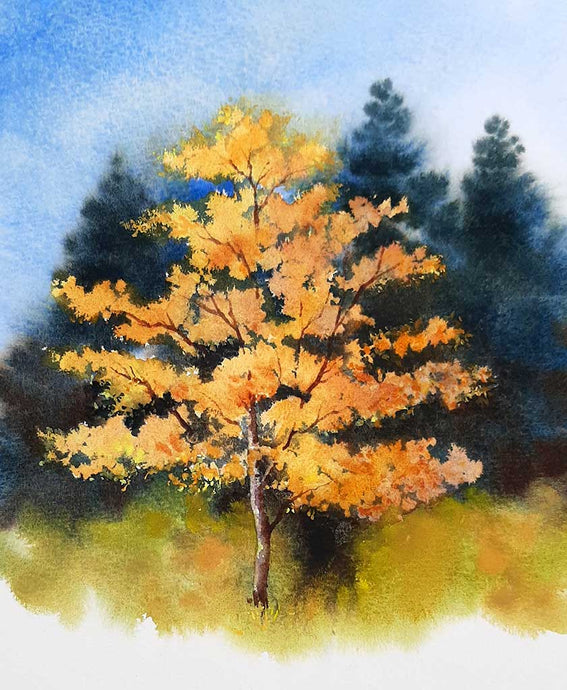
Here, after removing all the masking fluid, I put in the autumn foliage colours in the areas that had been protected by the masking fluid, using various mixtures of aureolin, burnt sienna, Indian yellow, and a purple shade made from Ultramarine and rose madder. The final part of this foliage stage was to use a touch of Naples yellow (for its opaque qualities) mixed with some of the autumn colours, this was put in with a number 2, fine brush to suggest the broken shapes of leaves at the edges of the branches. At this stage it's worth experimenting with the various colours added to the Naples yellow, to see what you find most effective.
The final stage was to put in the trunk. After wearing away the paint with clean water on a fine brush, following the thin shape of the trunk, I brushed in some dark brown on the right hand side of it, then followed this up with thin lines, to represent branches glimpsed amongst the foliage in the body of the tree.

Step 4
The final stage was to put in the trunk. After wearing away the paint with clean water on a fine brush, following the thin shape of the trunk, I brushed in some dark brown on the right hand side of it, then followed this up with thin lines, to represent branches glimpsed amongst the foliage in the body of the tree.
